Database to Multiple Databases
Statement of Problem
When you synchronize ACT! with another database, that is fairly
straightforward. You simply select the database in the dialog, and that is
it. But if you want to synchronize with several databases, you have to go
in to the menus and reset them for each individual. This is time
consuming, and prone to error.
Unfortunately, in the ACT! SDK
there is not a method or property to allow you to change this with a Visual
Basic Script.
Suppose we want to synchronize a database, ACTDEMO, with three
users, Beth, Bob, and Joe. We could do each one by one, synchronizing the
Beth Group with the Beth database, but how can we automate the tasks..
Solution
This solution is using Macros. However, the macros included with ACT!
are too restrictive, and not easily edited. The best Macro utility for
this is called Aldo's Macros by Aldo Vargas.
This utility allows you to edit the macro steps when necessary, and to copy and
paste new macros to add on more databases.
You can download this very helpful utility from
http://www.aldostools.com/macro.html
Database to Database Synchronization Steps - a review
We will begin by reviewing the steps that must be performed to switch the
destination or "target" database within the ACT! Synchronization Wizard.
We start in the "source" or "master" database, to synchronize "out to" the
target database.
|
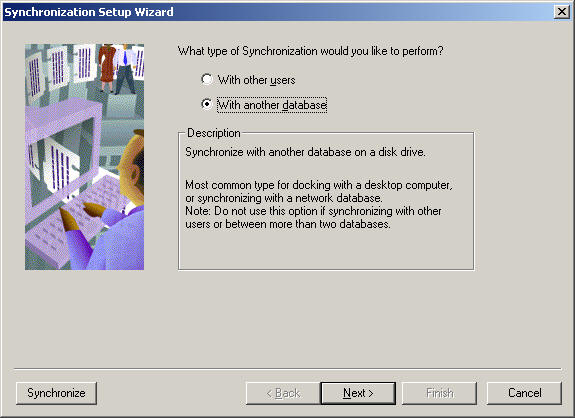
Synchronization Setup Wizard
Select With another database |
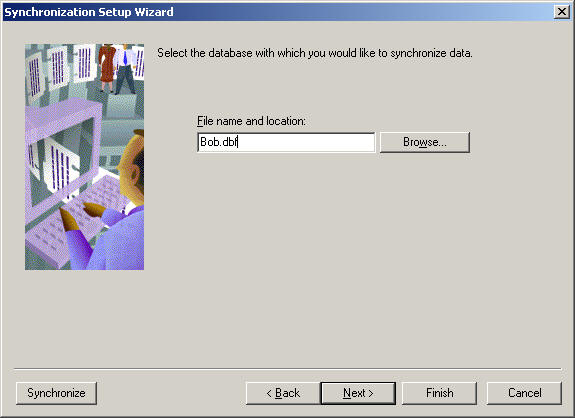
Enter the name of the database to synchronize into
in this case BOB.DBF |
|
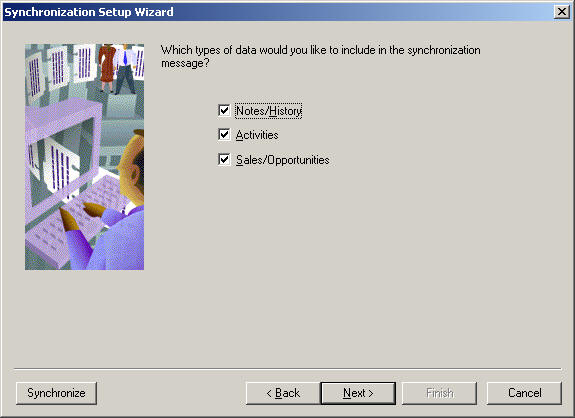
Select Notes/History, Activities, and Sales/Opportunities |
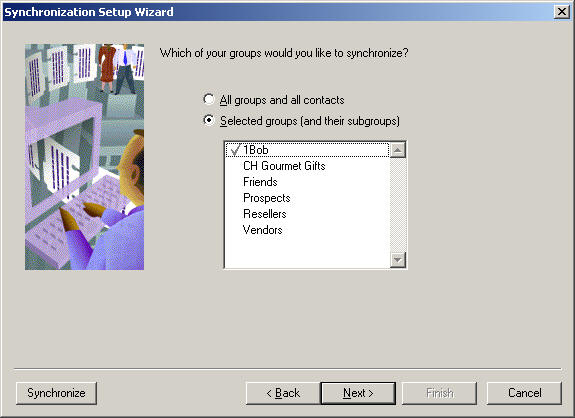
Select just the "1Bob" Group to synchronize |
|

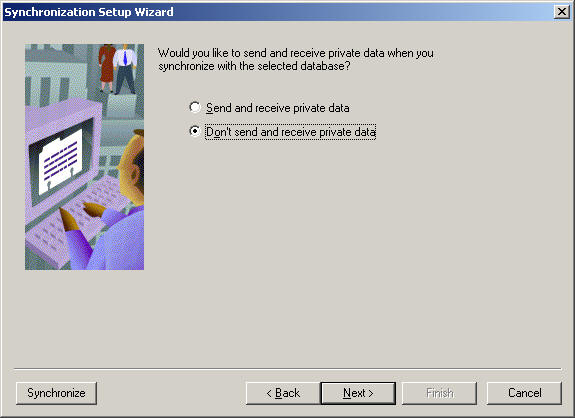
Specify whether you would like to send and receive private data |
If the database structures stay relatively constant
you can select not to update database field definitions |
|
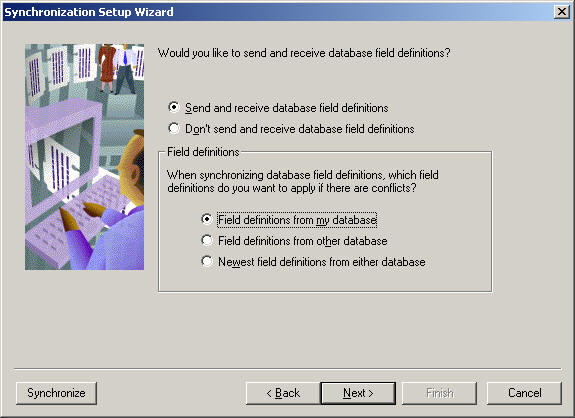
If you do change field definitions, you should do those
changes only in the source or "my database" |

You could specify an automatic synchronization but remember
it will only occur with the most recent database specified. |
|
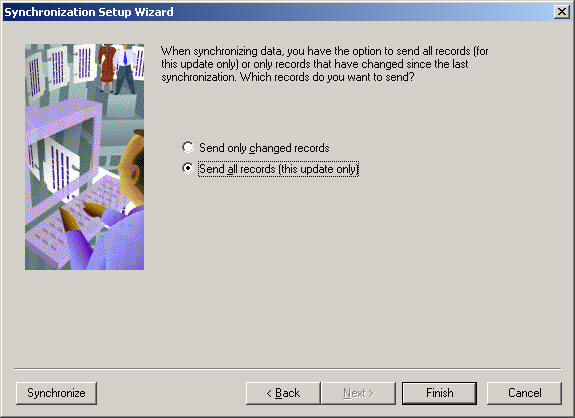
The first time you synchronize the source with a target database
you should synchronize all records |
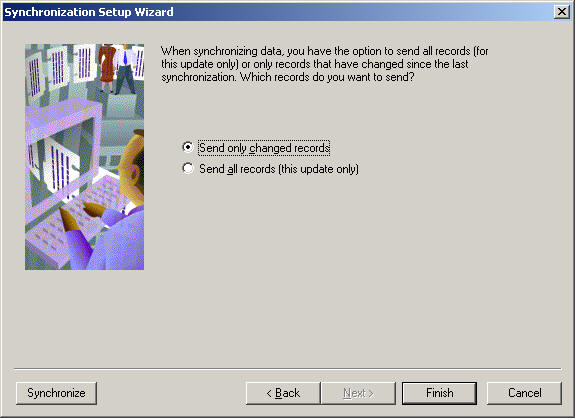
After than, you can just synchronize the changed records
to save time |
|
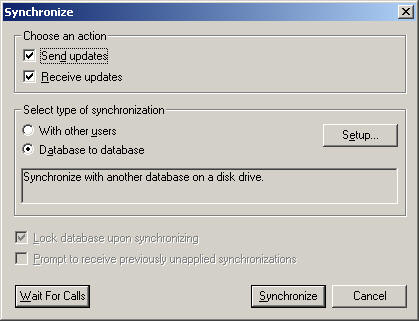
Now you are ready to select Synchronize to start the process
|
Preparation and Setup for the Macro
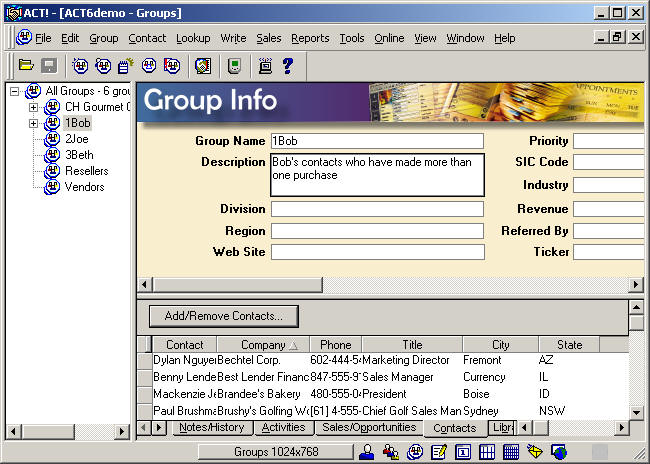
Create Groups with a Unique First Character
First we need to set up some groups with names corresponding the
databases. We suggest starting the group name with a number, such as 1 2 3
or other unique characters. There will be a point in the macro where we
will need to be able to press one key to select a group.
In the example below, the BOB.DBF will synchronize only the
records in the "1Bob" Group. The JOE.DBF will synchronize using the "2Joe"
group, and BETH.DBF will synchronize just the "3Beth" records. The
usefulness of the digits in front of the name are so that the "B" will not
select Bob, when you want to select Beth. You can use digits or any
character, just so long as the Group names start with a different character.
The uniqueness of the first character is very important.
Otherwise, the wrong group might get synchronized with the macro.
Preparing the Tool Bar
For the File Synchronize command, it is handy to have a Tool Bar
button for starting the Synchronization.
Automating the Steps with a Macro
Now, let's capture those keystrokes in to a Macro, using Aldo's
utility.
Start in the Source database, from the main Contact screen of
any contact.
Here are the Macro Steps
{Alt}f{/alt}z{Alt}n{/alt}{Alt}d{/alt}{Alt}n{/alt}c{Shift};{/shift}\act\database\bob.dbf{script}wait
1000{/script}{Enter}{Enter}{Alt}s{/alt}{Tab}1{script}wait 2000{/script}{Alt}n{/alt}{Enter}{Enter}{Enter}{Enter}
Explanation of the Steps
| {Alt}f{/alt} |
File menu |
| z |
SynchroniZe |
| {Alt}n{/alt} |
Next |
| {Alt}d{/alt} |
Database synchronization |
| {Alt}n{/alt} |
Next |
| c{Shift};{/shift}\act\database\bob.dbf |
C:\ACT\DATABASE\BOB.DBF |
| {script}wait 1000{/script} |
Wait 1000 milliseconds, or 1
second, to allow you to see what it is doing |
| {Enter} |
Enter for Next |
| {Enter} |
Enter for Next |
| {Alt}s{/alt} |
Select Groups |
| {Tab} |
Get cursor to the list of
groups |
| 1 |
Select the first letter of
the group, for example 1 for the 1Bob group |
| {script}wait 2000{/script} |
Wait 2000 milliseconds, or 2
second, to give the dialog time to react |
| {Alt}n{/alt} |
Next |
| {Enter} |
Enter for Next - keeping the
default for sending private data |
| {Enter} |
Enter for Next - keeping the
default for sending field definitions |
| {Enter} |
Enter for Next - keeping the
default for automatic synchronization |
| {Enter} |
Enter for Next - keeping the
default for Send only Changed or All records |
The macro leaves you ready to select the Synchronize
button.
If you want, you select the Setup button to double check the settings first.
You can Edit the Macros as needed, to change the path of the
database, for example to C:\ACT\DATABASE\JOE.DBF
With Aldo's Macros, you can copy the contents of one macro to
make a new macro for a new user. For example, here is the above macro
adapted for Joe. The changes have been put in bold for this illustration.
{Alt}f{/alt}z{Alt}n{/alt}{Alt}d{/alt}{Alt}n{/alt}c{Shift};{/shift}\act\database\joe.dbf{script}wait
1000{/script}{Enter}{Enter}{Alt}s{/alt}{Tab}2{script}wait
2000{/script}{Alt}n{/alt}{Enter}{Enter}{Enter}{Enter}
And here is the same for Beth
{Alt}f{/alt}z{Alt}n{/alt}{Alt}d{/alt}{Alt}n{/alt}c{Shift};{/shift}\act\database\beth.dbf{script}wait
2000{/script}{Enter}{Enter}{Alt}s{/alt}{Tab}3{script}wait
1000{/script}{Alt}n{/alt}{Enter}{Enter}{Enter}{Enter}
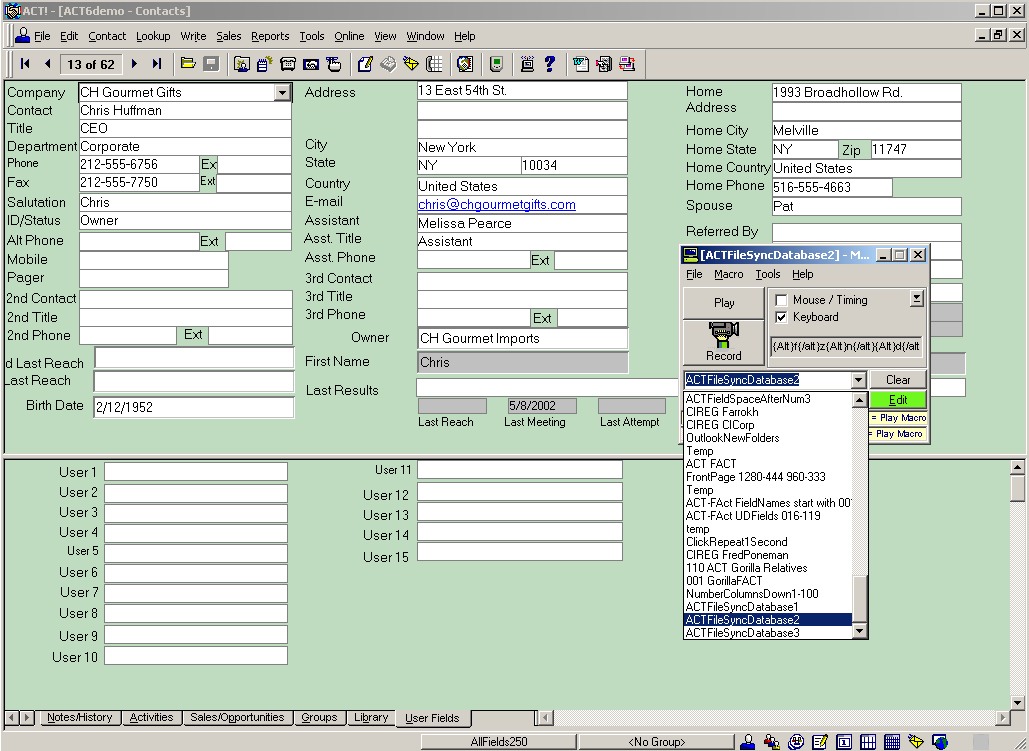
How to Use the Macros
When you are ready to synchronize, activate Aldo's Macros.
You will see the icon in the Windows Status Bar. Double click to open it
up.
With the File Macro List, Edit Macro List screen, you can place
the 3 macros on your Macro drop down list for easy viewing and clicking.
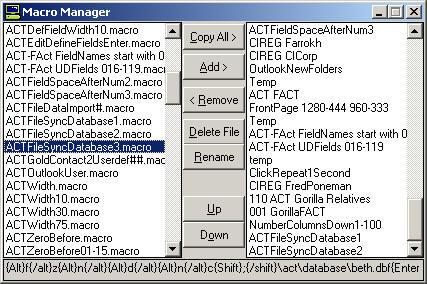
You can simply copy and paste the above examples in to your
macro list.
If you need more than 3 macros, you can copy the files and use
the same pattern of commands, making the changes to the DBF path and Group
Number as necessary.
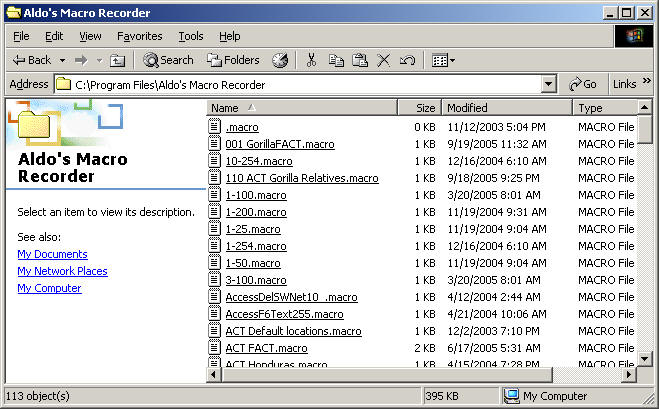
Or you can download the above files and place them in the
C:\Program Files\Aldo's Macro Recorder folder, where all the ".macro" files
are stored.
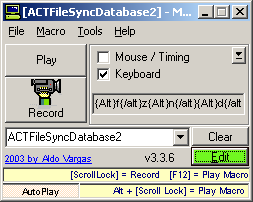
ACTFileSyncDatabase1.macro
ACTFileSyncDatabase2.macro
ACTFileSyncDatabase3.macro
For new macros in this folder, you will need to put them on the
drop down menu with the File, Macro List, Edit Macro List dialog illustrated
above.
Test Run
Make sure you back up your databases first, then try out the
macros. Remember you only need to be in the main database, the source.
Bring up the Macro list and start with the First Macro.
Watch carefully what it is doing during the seconds of wait time. If all
look ok, then press Synchronize.
Then go on to the next Macro.
It is possible to string them all together in to one macro with
some advanced commands, but better to be safe than sorry. One mistake in
the macro keystroke sequence could cause it to synchronize the wrong database.
At least the macro makes it easy to do each one.
Thanks again Aldo!
CICorporation.US