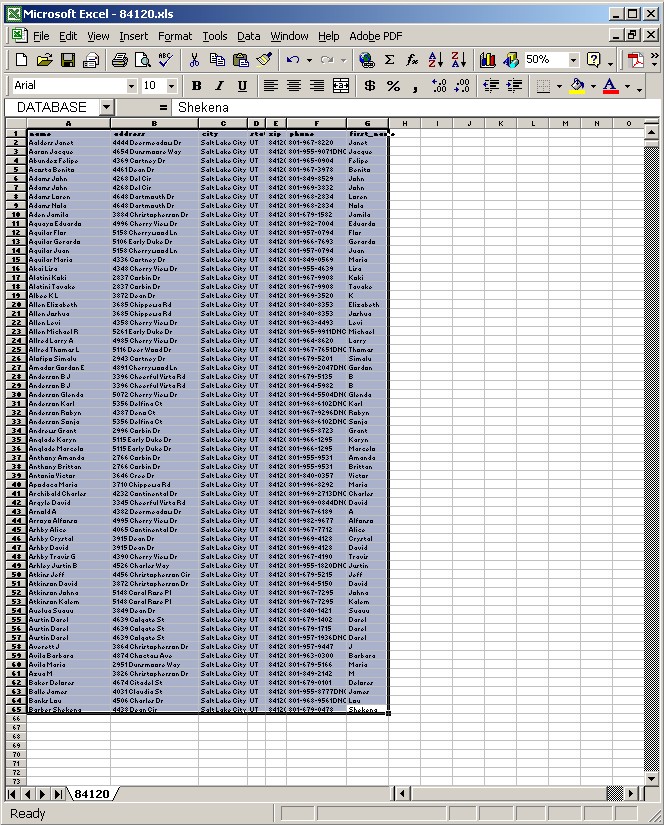
Preparing an Excel .XLS file for use with DoNotCallSoftware

|
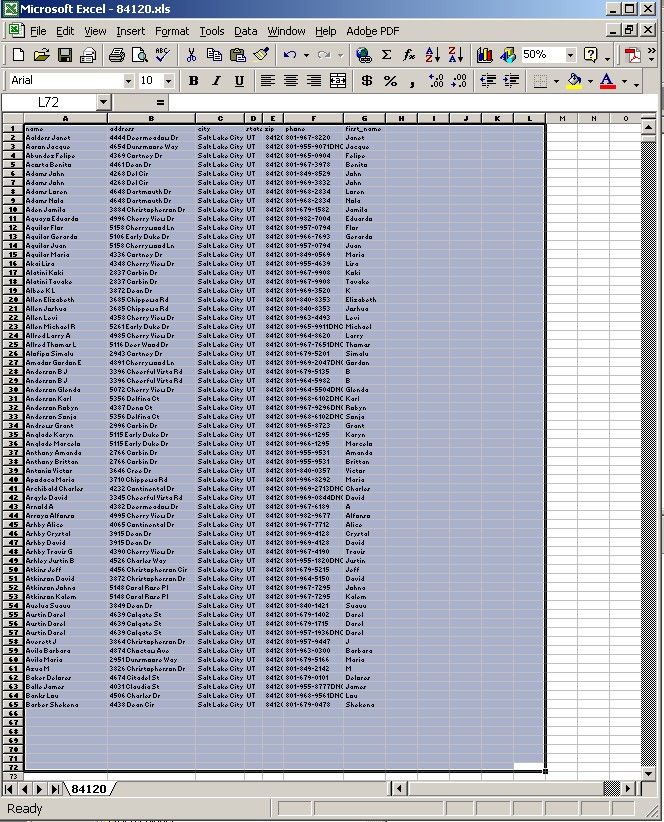
Pressing Ctrl+Shift+End shows that "Blank Space" is present |
Select this area, and define it as "DATABASE" |
6. Get rid of all "Blank Space" to the right and below your data.
This Blank Space can cause problems because it causes the Do Not Call Software to think that there are more columns than there actually are. It also causes the software to think that there are more rows to process than there actually are. Any files saved from the Excel spreadsheet, such as Comma Separated Value (CSV) or dBase Files (DBF) will also have these blank rows.
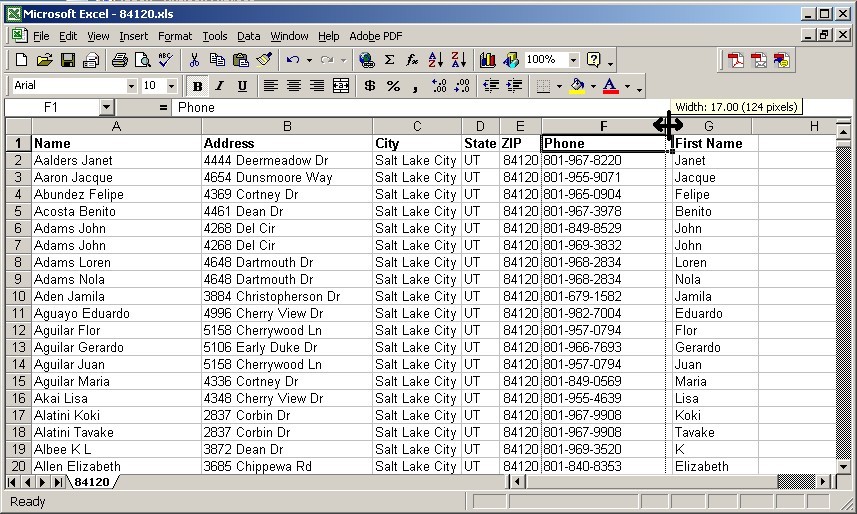
A. First select all the columns to the right that you do not need, in this example
columns H through L.
It does not hurt to select more columns to the right, just to be safe, such as H
through Z, or even to column IV
B. Select Edit, Delete to delete those columns, which will make sure no hidden information remains from them
C. Now, do the same for the rows you do not need, by selecting Rows from 66
though 72.
It does not hurt to select more rows, from 66 down through 65536.
You can do this by starting at A66, then pressing Ctrl+Shift+End
D. Select Edit, Delete, which will delete those rows.
E. Now File, Save which will update the "UsedRange" in the Excel Worksheet
F. You can now test with Ctrl+End to see that the lower right corner is as far as there is data.
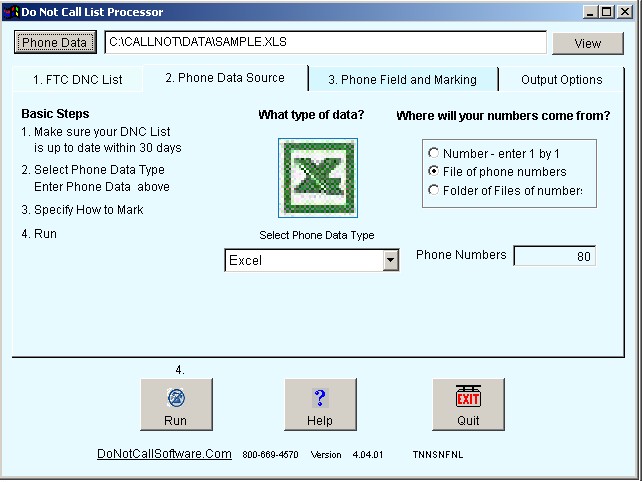
You can specify that the DNC Marker is Before, After, or
Replacing the Phone number
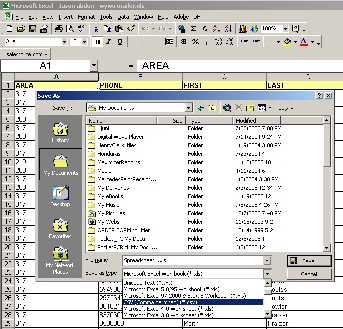
Sometimes the Comma Separated Value (CSV) format is better for Do Not Call processing.
File
Save As
Select Save As Type
Change it to CSV (Comma
delimited) (*.CSV)
Enter
your desired file name with a .CSV at the end