
 How to import a PST file to
Microsoft Exchange Online
How to import a PST file to
Microsoft Exchange Online
NOTE: Do not proceed with the following instructions until your mail account has been migrated to Microsoft Exchange Online.
This article provides instructions on how to import your existing .pst files onto Exchange Online using Outlook 2013 or Outlook 2010.
Microsoft Outlook stores messages, contacts, appointments, tasks, notes, and journal entries in one of the following two locations:
- In a personal storage folder, also known as a .pst file, on your hard disk drive.
- In a mailbox that is located on the server. Your mailbox is located on a server if you use Outlook with Microsoft Exchange Server.
Importing your .pst files from your computer to Exchange Online moves your offline emails to the mailbox on the Exchange server. This will make them accessible from any device that you access your Exchange Online email from.
Before moving forward, locate your .pst files and, for simplicity, move them all to one single location. By default, Outlook saves .pst files to C:\Users\NETID\Documents\Outlook Files.
If you have saved your .pst files elsewhere, you can locate them with a quick search term using File Explorer’s search function:
Open File Explorer and type in “*.pst” into the search bar in the upper right-hand corner. This will search for all of the .pst files available on your computer.
Outlook 2013:
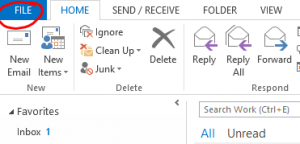
1. From Outlook 2013’s mail window, click on the File tab.
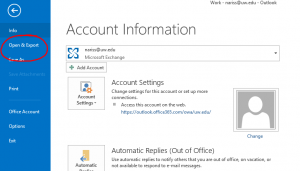
2. Select Open & Export from the menu on the left-hand side.
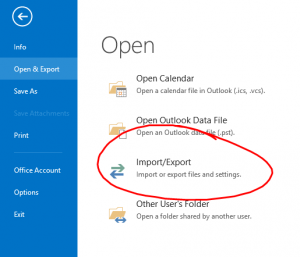
3. Click on Import/Export.
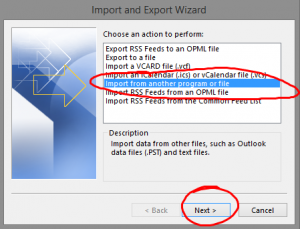
4. Select “Import from another program or file” and click Next.

5. Select “Outlook Data File (.pst)” and click Next.
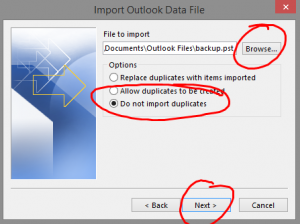
6. Locate the .pst file you would like to export to Exchange Online using Browse… or paste the file path into the text field. Select Do not import duplicates and click Next.
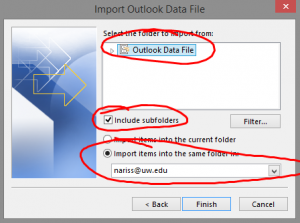
7. Click on Outlook Data File to select it, make sure Include subfolders is checked, and that your UW email is selected under Import items into the same folder in:; Select Finish.
8. Repeat these steps for each .pst file you have until all of your .pst files have been uploaded to Exchange Online. Once finished, verify that the emails from your .pst files have been successfully imported to Exchange Online, then delete your .pst files off your computer.
Outlook 2010:
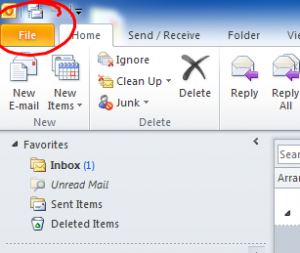
1. In Outlook 2010, select the File tab.
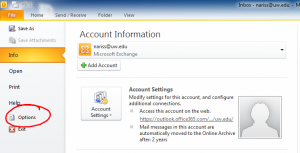
2. Click on Options from the menu located on the left-hand side.
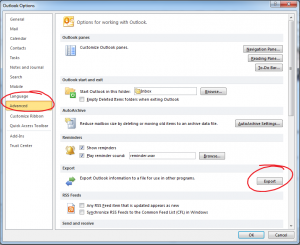
3. From the Options window, select Advanced in the left-hand menu, then click on Export under the Export section of the menu.
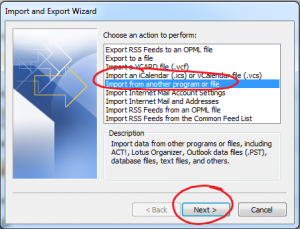
4. From the Import and Export Wizard, select Import from another program or file and click Next.

5. Select “Outlook Data File (.pst)” and click Next.
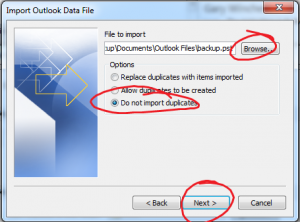
6. Locate the .pst file you would like to export to Exchange Online using Browse… or paste the file path into the text field. Select Do not import duplicates and click Next.

6. Click on Outlook Data File to select it, make sure Include subfolders is checked, and that your UW email is selected under Import items into the same folder in:; Select Finish.
7. Repeat these steps for each .pst file you have until all of your .pst files have been uploaded to Exchange Online. Once finished, verify that the emails from your .pst files have been successfully imported to Exchange Online, then delete your .pst files off your computer.
1-202-829-4444